Showing posts with label Baking Class. Show all posts

Monday, March 18, 2013

Last Baking Class - One Hour Cinnamon Rolls

I am so mad at myself for not taking pictures of our last cooking class. It was a whirlwind of a class though so I am not beating myself up about it too much. And don't let the lack of picture stop you from making these rolls! We made a double batch of this dough and if I had paid more attention to the recipe I would have realized that one batch makes a TON of rolls. Oh well!  It fed the masses that came to visit our house for the weekend. Anyhow, these rolls are super tasty and really take such a small amount of time to make. I recommend when you split the dough in half to make one half of the down cinnamon and the other half orange. So worth it! YUM!!!
One Hour Cinnamon Rolls
Mix and let sit for 15 minutes:
3 1/2 c. warm water
3/4 c. sugar
1/2 c. oil
6 T. yeast (4 1/2 Saf-Instant)
 Then add:
1 T. salt
3 eggs
10 1/2 c. flour 
Mix together for 10 minutes, then sit for 10 minutes. Oil cupboard, dump out dough. Divide in half. Roll one half out into rectangle. Spread with ¼ c. melted butter and then with cinnamon-sugar mixture. Roll up tight, but not too tight. Divide into 12 rolls and place on greased cookie sheet. Repeat with other half of dough. Let rise. Bake for 12-15 minutes at 400.

Cinnamon-Sugar
1c. sugar
1 T. cinnamon 
Frosting
1 cube butter
2 dashes salt
2 t. vanilla
6 c. powdered sugar
milk

Orange Rolls: Add the juice of 1 orange and the zest to the filling. Add orange juice
to regular frosting
Chocolate Rolls: Add baking cocoa and a few drops of water to regular frosting
Cream cheese Rolls: Add cream cheese to regular frostin

Monday, February 25, 2013

Cooking Class Part 4

Our most recent cooking lesson was on setting the table properly, table manners and they made a recipe all by themselves . . . pancakes.  Recipe to follow.  Just ignore the mug in the bowl in the picture below.  I'm not sure how that ended up like that . . . Piglet maybe . . . but it was perfect at one point, I promise.  Here's the link I used for a coloring page for an informal setting.
Here's a link to a more formal setting
 The kids were so cute about the "fancy" table setting.  They talked very proper like and it was a lot of fun.  Before they could eat we went through a list of proper table manners.  I was sad my son was not here for this portion of the lesson cause he could definitely use some reminders.  I think I see a future Family Home Evening lesson in the works.
 And look at this. Napkins on their laps and elbows off the table.  What proper young ladies they are.
Pancakes
1 cup white flour
1 cup wheat flour
1/2 tablespoon sugar
1/2 teaspoon salt
4 teaspoons baking powder
2 cups milk
2 eggs
4 tablespoons oil

Start heating nonstick griddle to 350-400 degrees.  Combine all dry ingredients in large bowl and combine with wisk.  In separate bowl combine milk, eggs, and oil.  Add wet ingredients to dry ingredients and mix until just combined.  Do not over mix.  A few lumps are o.k.   Spray griddle with nonstick spray.  Using a 1/4 - 1/3 cup measuring cup, depending on the size of pancakes you want, pour batter onto griddle leaving about and inch in between each pancake.  When pancakes start to dry slightly around the edges and bubbles start to form in the center flip the pancake using a spatula.  Cook for another couple minutes until underneath side is golden brown then remove to a plate and continue the same method with the rest of the batter.  

Sunday, February 24, 2013

Cooking Class Part 3

This lesson was ALL about eggs!  Cracking, separating, whipping, scrambling, boiling . . . you name it, we talked about it!  First off we made omelette's in a bag.  They cracked the eggs themselves, scrambled them and then put them in a bag.  They added various toppings of their choosing and then sealed it up.
Into the boiling water they went.  I promise the water is boiling.  For some reason the camera didn't capture the boil.  Hmm... interesting!
 Here it is all cooked and ready to come out of the bag.
And here is the omelette ready to be eaten.
 On a side note, when serving eggs to kids make sure you have plenty of ketchup.  I might have forgotten we were pretty much all out of ketchup upon serving the eggs and the girls probably got an 1/8 of a teaspoon of ketchup each.  No joke . . . an eighth of a teaspoon!  And even that might be more than what they actually received!  Sad day on the ketchup front!
We also learned what happens to egg whites when air is added by beating them really fast.  Thanks to a fellow homeschool friend who gave the suggestion to do this part of the egg unit.  It turned out so well! You can find her awesome homeschool blog here http://theeverydayhomeschool.blogspot.com
We made these little meringue cookies.  The recipe for these and the omelets will follow.
 We also learned about melting chocolate and decided to dip our cookies in said melted chocolate.  Yum!  Here are pics of each of the girls giving cookie dipping a go.


 And here is Piglet, again, tasting our tasty treats.  I don't think she actually ate the cookies.  I'm pretty sure she just used her fingers to dip and lick off all of the chocolate.  What can I say?!  A girl after my own heart!
 These are pretty much marshmallow cookies dipped in chocolate.  How can this go wrong . . .
 It can't!
 Check out these cute chocolate faces!  Its a good thing our lesson on manners and etiquette is the next lesson cause I'm pretty sure after these cookies it would have been an epic fail.  But so worth it!  And fun!
Omelette in a Bag
2 eggs 

2 slices ham, chopped (optional)
1/2 cup shredded Cheddar cheese 

1 tablespoon chopped onion (optional) 
1 tablespoon chopped green bell pepper (optional) 
2 tablespoons chopped fresh tomato (optional) 
1 tablespoon chunky salsa (optional) 
2 fresh mushrooms, sliced (optional) 
Directions
  1. Crack the eggs into a large resealable freezer bag. Press out most of the air, and seal. Shake or squeeze to beat the eggs. Open the bag, and add the ham, cheese, onion, green pepper, tomato, salsa, and mushrooms. Squeeze out as much of the air as you can, and seal the bag.
  2. Bring a large pot of water to a boil. Place up to 8 bags at a time into the boiling water. Cook for exactly 13 minutes. Open the bag, and let the omelet roll out onto a plate. The omelet should roll out easily.
Snow Cookies
2 egg whites
1/2 teaspoon vanilla
1/4 teaspoon cream of tartar
1/2 cup sugar
1 cup chocolate chips
1 teaspoon vegetable oil
1/2 cup peppermint candies
Directions
Separate egg whites and let stand at room temperature about 30 minutes. Preheat oven to 300 degrees. Line a baking sheet with silpat or parchment paper and set aside.
Using an electric mixer, beat vanilla, cream of tartar and egg whites till soft peaks form (tips curl).
Slowly add sugar, 1 Tablespoon at a time, beating on high speed till stiff peaks form (tips stand straight) and sugar is almost dissolved.
Spoon meringue mixture into a piping bag fitted with a large star shaped tip. Pipe 1-2-inch stars onto baking sheet.
Bake in preheated oven for about 15 minutes or until cookies just start to turn brown. Turn oven off and let cookies dry in oven with door closed for about 10 minutes. Remove cookies and cool on wire racks.
Melt chocolate and vegetable oil and place in small bowl. Crush peppermint candies in either a food processor or mini chopper and place in another small bowl.
Dip tips of snow cookies in melted chocolate. Sprinkle crushed peppermint dust on top of chocolate. Enjoy with family and friends on a fun snow day! Happy Cooking :)

Friday, February 22, 2013

Cooking Class Part 2

Here is our first cooking class.  All of the girls aprons are hung up and there recipe books laid out on the table.  For the recipe books I just bought those cheap plastic photo books and put there names on the cover and titled them Chef in Training.  Super simple!  Every class I add the recipes we are going to make for the day and then when we are done with all the classes they'll get to take them home.
What a cute bunch of girls!
 Our first class we learned all about safety and sanitation when it comes to cooking and baking.  Here they are washing their hands . . .  very thoroughly!
We also learned about proper measuring techniques.  Here is one of the girls friends spooning flour into the measuring cup.
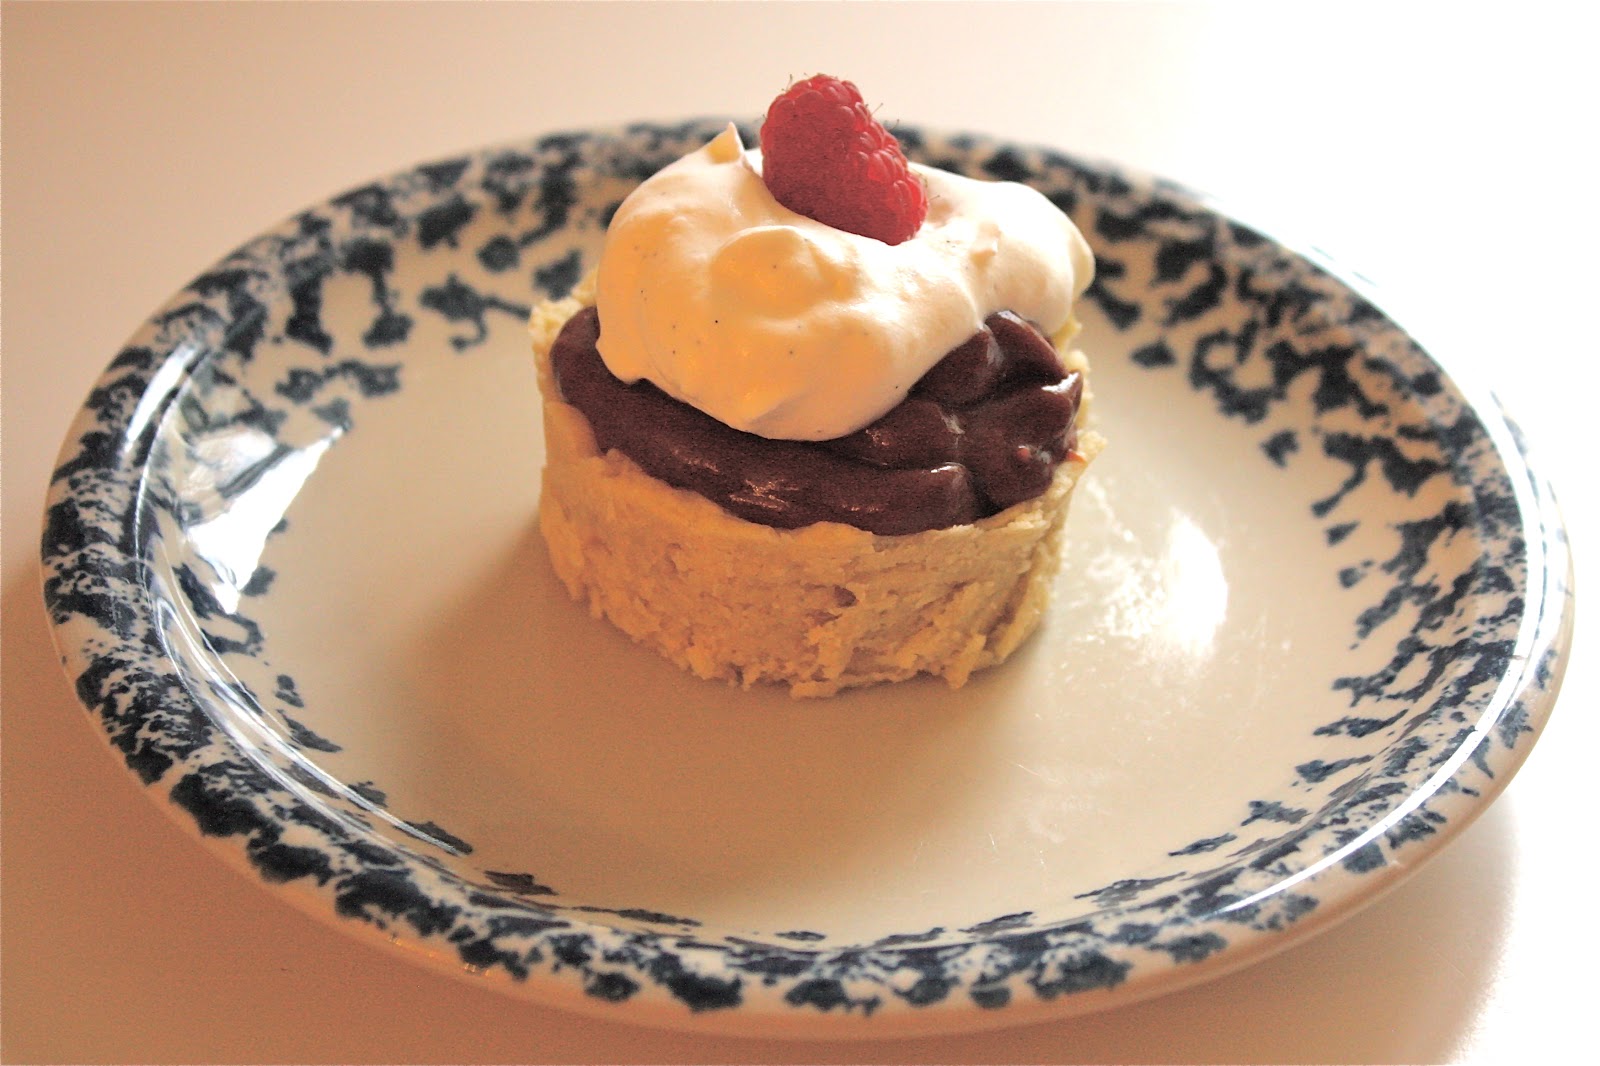
And finally tasting the food we made!  We made pudding in a cup topped with vanilla bean whipped cream and raspberries!  YUM!!!  It was soooo good!  Recipe to follow!
 Our little piglet gets to join in on our classes so she of course gets to taste EVERYTHING!
 Here is one of the desserts and the girls made them all by themselves.  How fun and what they called "fancy!"

Pudding in a Cup 
(adapted from kids-cooking-activities.com)
1 1/2 Cups flour
1/2 Cup of butter, melted
6 Tablespoons powdered sugar
1/2 teaspoon vanilla
6 teaspoons cold water
1 larger box instant chocolate pudding
The chef-in-training can do all these steps then have an adult bake in the oven. Preheat oven to 375 degrees. In a bowl add flour and powdered sugar. Mix together. Add butter and stir until mixture is crumbly. Slowly stir in cold water and vanilla. Mix thoroughly. Grease muffin tins and spread dough in each of the muffin cups. Press dough up along sides of each cup. Bake until golden brown, about 10-15 minutes. Allow to cool.  While cooling prepare instant pudding.  When dessert cups are cool, fill  with pudding and top with whipped cream and berries.
We used custard cups, but muffin cups are usually more available.
Sweetened Whipped Cream 
(adapted from our best bites)
1 c. whipping cream
1/3 c. powdered sugar
Optional: 1 teaspoon vanilla extract
and the scrapings of the inside of a vanilla bean.
Instructions:
Combine whipping cream and powdered sugar in a large bowl.  With an electric hand mixer begin beating whipping cream and sugar. As it starts to thicken add extract and vanilla bean seeds if desired. Continue beating whipping cream until soft peaks form.
Serve immediately with pie, cake, ice cream sundaes, etc.


Thursday, February 21, 2013

Cooking Class Part 1

Every other Friday we participate in a homeschool co-op swap.  Porkchop goes to Kinderboys and I keep the girls and pick up two of their friends for a cooking/baking class.  I decided we couldn't have proper cooking/baking instruction without proper attire.  And I also decided that any apron in the store wouldn't do!  A) They were to expensive and B) they weren't that cute.  So off I went to Hobby Lobby to find some fabric . . . cheap fabric.  After all, I had to make 4 of them.  I found this red and white polka dot fabric that I thought was sweet and then I found some ruffle trim that I knew I could incorporate somehow.  The flowers were at Hobby Lobby too and already had a safety pin on them so I can remove them for washing.  My mother-in-law had some old white pillowcases that she donated that I used to make the waist piece/tie.  I LOVE how they turned out and that the girls all match for their class.  Later I will post what we are learning about!  Stay tuned!
Blogging tips